

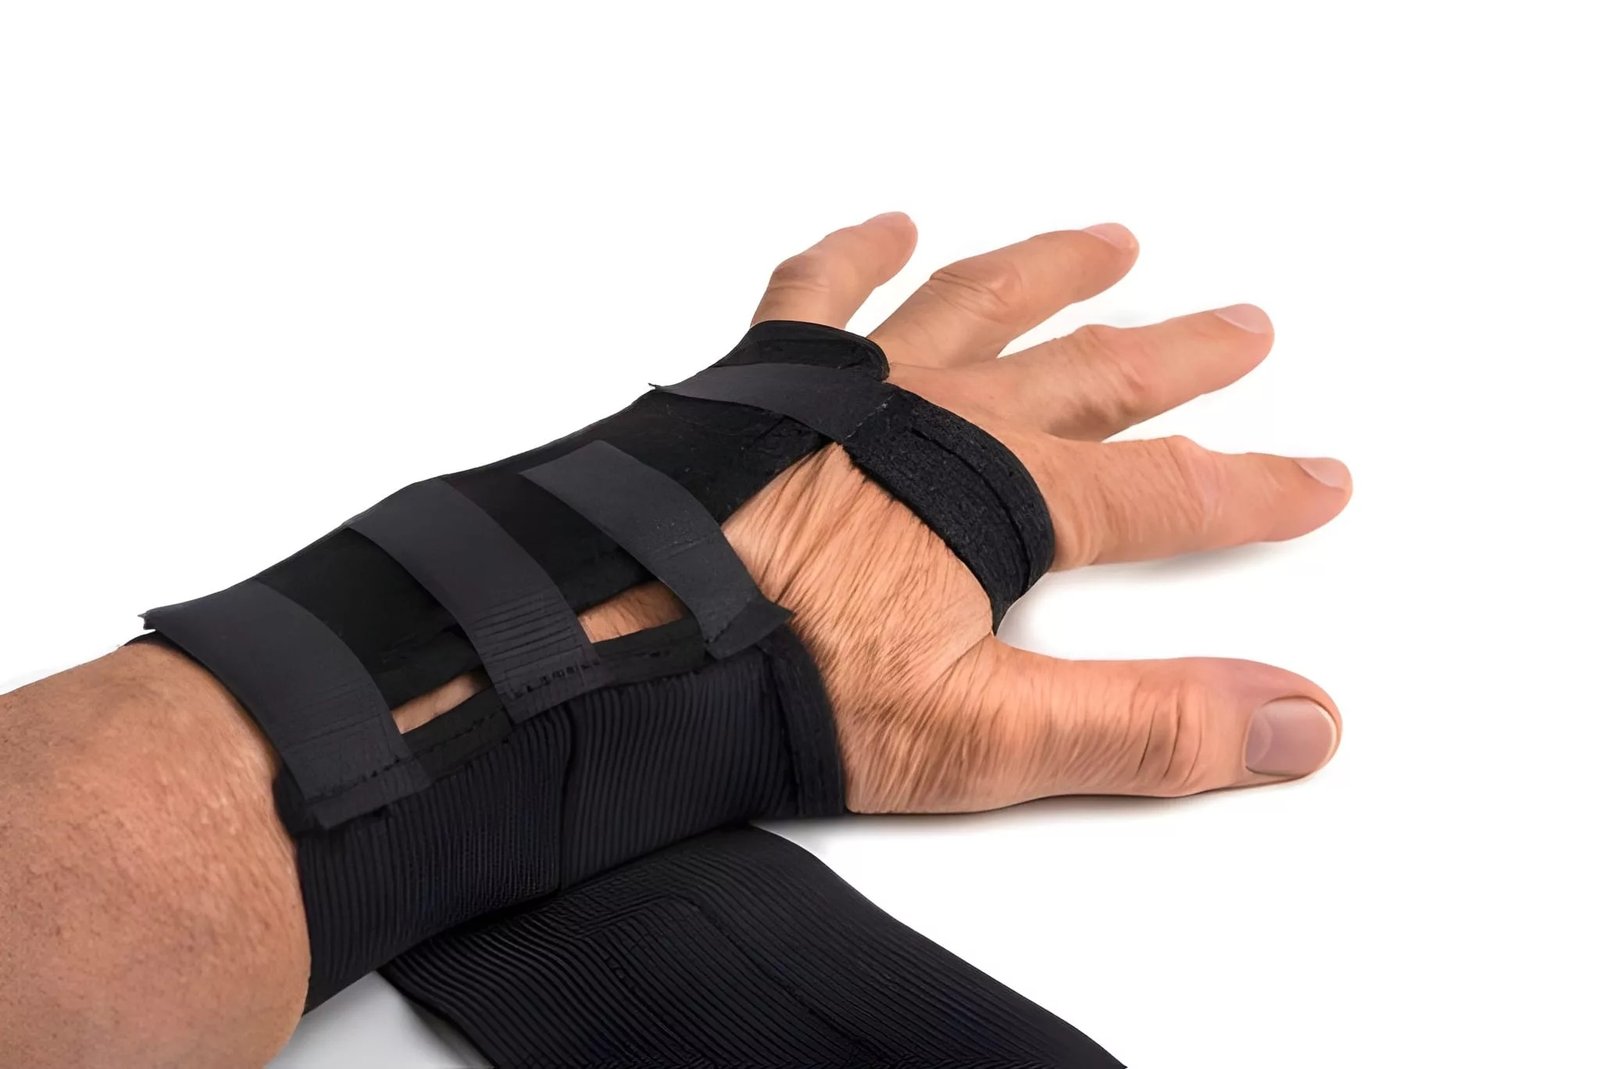
What is Splinting?: Splinting Techniques Rehabilitation
Splinting Techniques Rehabilitation Splinting is a medical technique used to immobilize and support injured limbs with the help of a device called a splint. This process helps stabilize fractures, reduces pain and swelling, minimizes blood loss, and allows proper healing to occur. Unlike casts, which completely encase the limb, splints cover only a portion of the injured area and are usually secured with elastic bandages or similar materials.[1]
A splint is used to hold an injured part in its place and is usually made of plaster or fiberglass. Think of it as a helping tool that will keep any injured part in its place so that your body can recover on its own without any additional injury.[2] In some cases, especially in emergencies, wooden splints are used for immobilization.
Purpose of Splinting
Splints are useful in dealing with your injury in the following ways:[3]
- Fixing the injured limb to ensure that it does not get any more damage.
- Relief in pain and discomfort occurs due to reduced movements.
- Protection of the affected area from any external impact.
- Healing and bone alignment are greatly increased.
- Swelling during the early phase is accommodated in splints, unlike casts.
- Soft tissues of surrounding muscles, tendons, and ligaments are protected from any damage that can occur if not immobilized injured area.
- They also provide support during the transport of trauma patients and in cases of dislocations,tendon injuries, and soft-tissue damage.
General Principles of Splinting
Before applying a splint, your doctor will do some assessment:
Pre-Application Assessment
A thorough examination of your motor, sensory, and neurovascular system should be performed. This means checking:[4]
- Blood circulation through checking your pulse, colour, and temperature on your skin
- Sensations (to check whether the patient feels touch or not)
- Movements (if the patient moves fingers or toes
The injured area is also inspected for open wounds, deformity, or contamination, which must be cleaned and dressed before splinting.
Preparation is the Key
To avoid a premature setup of plaster or fiberglass, everything should be prepared before applying a splint. With everything prepared, the application process becomes easy.
Proper Position
A proper position of a joint is where the joint is naturally relaxed, so it should be placed in this proper position. For example, the wrist should be slightly extended, and the ankle should be at 90 degrees. The functional position helps prevent stiffness and contractures during healing.
Proper Padding
Padding must be at least two to three layers thick, but not be constrictive, and must go 2 to 3 cm beyond the target splint edges. Additional padding is essential around the bony parts of the ankle bones, elbow, and wrist bones to avoid pressure ulcers.[5] Avoid excessive padding as it can loosen the splint and reduce stability.
Splinting Techniques
Various injuries need different methods of splinting. The most common methods are the following:fractures.Joint Drs Journal.” style=”position:relative;color:#309b65;cursor:help;border-bottom:1px dotted #309b65;font-weight:bold”>[6]
Upper Extremity Splints
1. Volar (Forearm) Splint7 MPC Authors. (2023). Upper Extremity Splint Application. ScienceDirect.
- Flows in a palm direction of the forearm.
- Applied to fractures of the wrist and in splinting for carpal tunnel syndrome.
- Extends from the palm to just below the elbow
2. Sugar Tong Splint
- Splint around the forearm in the shape of a U.
- Prevents the rotation of the bones of the forearm.
- Usually applied to the forearm and wrist injuriesor fractures.
3. Thumb Spica Splint
- Immobilizes the thumb and wrist
- Applied to the fracture of the thumb and ligament rupture.
4. Ulnar/Radial Gutter Splint
- Helps the index/middle or the pinky fingers.
- Used to treat hand and finger fractures.
- Finger splints are commonly used for minor hand fractures or ligament injuries.
Lower Extremity Splints
1. Posterior Leg Splint
- Runs from the bottom of the great toe, along the back of the lower leg, and ends 2 inches below the head of the fibula.
- Applied to lower leg and ankle injuries.
- These splints are often used to stabilize the lower leg in injuries, including ankle fractures, soft tissue injuries, and conditions like shin splints.
2. Stirrup Splint
- Starts at the lateral mid-calf and then passes around the heel up to the medial mid-calf.
- Aids in ankle stabilization excellently.
Sometimes, both posterior and stirrup splints are combined for added immobilization in severe ankle injuries.
Application of Splinting: Step-by-Step
These are the steps to follow when using the splint:[7]
Step 1: Gather Materials
- Stockinette (tubular fabric)
- Cotton padding or synthetic padding.
- Splinting material: plaster or fiberglass.
- Elastic bandages
- Bucket of water
- Scissors
Step 2: Measure the Splint
Prepare and measure the splinting material on the uninjured limb. The splint must be a little longer to make sure that it is fully covered.
Step 3: Apply Stockinette
Cover the injured part with the stockinette and bring it approximately 2 inches further than where the splint will finish.
Step 4: Add Padding
Pad with 2-3 layers on the region to be splinted, and between digits, where necessary, with an addition of 2-3 layers on bony prominences.
Step 5: Prepare Splinting Material
In the case of upper extremity splints, 6-10 layers are required; in the case of lower extremity splints, 12-15 layers are used. Prepare splinting material and wet it with lukewarm water. Warmer water causes it to set faster.
Step 6: Apply the Splint
Apply wet splinting material on the padded part. Fold the ends of the stockinette back over the splint edges to create smooth borders.
Step 7: Mold the Splint
If you mold splint material with your palm, it will avoid ridges, which are painful to the patient. Follow the natural contours of the limb to shape it.
Step 8: Cover with an Elastic Bandage
Cover the splint with an elastic bandage that is not too tight because this may cause a restriction of blood flow.
Step 9: Elevate and Monitor
Maintain the splinted limb at a level higher than the heart and observe the complications.
Splinting vs. Casting
Splints are often used initially, while casts are applied later once swelling subsides. Here’s how to compare both:[8]
| Feature | Splint | Cast |
|---|---|---|
| Coverage | The hard part does not wrap all the way around the injured area | Wraps completely around the limb |
| Adjustability | Can be easily removed or adjusted | Cannot be removed by the patient |
| Swelling accommodation | Allows for natural swelling during the acute inflammatory phase | Less forgiving during the acute inflammatory stage |
| Immobilization | Provides good support | Provides best immobilization |
| Application time | Faster and easier to apply | More time-consuming and technically difficult |
| Complications risk | Lower risk | A higher risk of complications |
When Are Splints Preferred?
In acute care, splinting is the best method of immobilization because it accommodates swelling and allows for easier examination of the injury site. When swelling subsides, you can convert to a cast. [9]
When Are Casts Necessary?
If you have complex fractures or swelling is diminished, then you need maximum immobilization. Here, prefer casts, which also work when the injury needs long-term stabilization.
Types of Splints
Based on Material
According to the properties of materials, splints can be of the following types:[10]
Rigid Splints
- Materials used in these are cardboard, hard plastic, metal, or wooden materials
- These provide very strong immobilization
- Used in emergencies
Soft Splints
- Comprises air splints, pillows, and sling and swathe-type splints
- More comfortable in case of minor injuries
- Allow some flexibility
Prefabricated vs. Custom Splints
- Some splints are either made out of fiberglass or plaster, but others are ready-made and are available in various shapes and sizes.
- Custom splints offer a better fit
- Off-the-shelf splints are convenient and readily available
Based on Function
Static Splints
- Prevent motion
- Used when complete immobilization is needed
Dynamic Splints
- Functional
- These also improve the range of motion during recovery
Selecting the Splinting Material: Plaster or Fiberglass
The decision of plaster or fiberglass has a great influence on the outcome of the treatment. Knowing how they are different assists medical professionals in choosing the best.[11]
Plaster of Paris
Published in 1852 by military surgeon Antonius Mathijsen, it has been in use for over a century to immobilize fractures and was the only real rigid splinting material until fiberglass was invented in 1987.
Advantages of Plaster:
- More flexible and are more desirable to retain position-specific reduction.
- Reduced setting time will enable more time to apply and shape the material before it settles.
- More cost-effective than fiberglass
- Generates lower heat during setting and decreases patient pain, as well as the risk of burns.
- More suitable for the complex fractures that need to be accurately molded.
Disadvantages of Plaster:
- Heavier and bulkier
- Takes a long time to dry (typically 30-45 minutes)
- Restricted by drying time, and needs increased user experience.
- Will not get wet, as water will crack or disintegrate
- More messy to apply
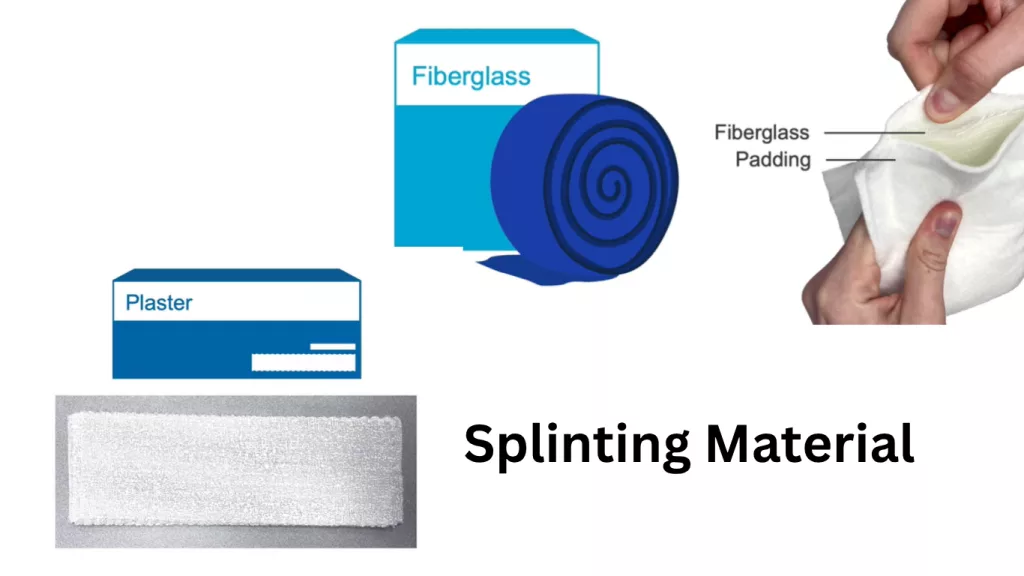
Material used in splinting: Plaster and Fiberglass
Fiberglass Splints
Fiberglass is less flexible, hardens fast, is easy to apply, and is light.
Advantages of Fiberglass:
- Light and easy to apply, and more porous.
- Works faster (sets in 15-30 minutes)
- More comfortable and breathable for the patients.
- Water-resistant in some formulations
- Better X-ray transparency
- Come in different colors, attractive to children.
Disadvantages of Fiberglass:
- Costs more and is not very reliable for mold.
- hardens faster, and it needs to be applied more quickly.
- Less flexible to complicated fractures.
- When you use warm water, it may result in more heat during setting.
Importance of Water Temperature in Splinting
For the time of setting the molds, water temperature is the most significant factor. Normally, the casting materials set more slowly in cold water than in warm water. The more rapid the setting process, the higher the amount of heat generated, and the possibility of severe skin burns. So, always use lukewarm water.[12]
Complications of Splinting
While splinting is generally safe, complications can occur. Be aware of these warning signs:
Compartment Syndrome
Compartment syndrome is a result of developing high pressure in a closed compartment, which leads to decreased blood flow and tissue perfusion. This is the most severe complication.[13]
Warning signs include:
- Extreme pain, which is not relieved by pain medications.
- Pain with passive movement
- Numbness or tingling
- Pale, cold, or blue-colored skin
- Inability to move fingers or toes
In cases where a patient with immobilization complains of progressive pain, tingling, numbness, or any sign of vascular injury, hospitalization to the nearest emergency department is urgent so that the cast can be removed accordingly.
Other Complications
- Pressure sores: These are due to insufficient padding of the bony prominences.[14]
- Thermal injuries: Thermal injuries occur as a result of the heat produced during the setting of plaster.
- Infection of the skin: It may develop in a damp and hot place beneath a splint.
- Joint stiffness: A consequence of immobilization.
- Skin irritation or dermatitis: From moisture or pressure
Recovery and Follow-Up
To ensure proper recovery, follow-up appointments are made to:
- Check healing progress
- Adjust or replace the splint as swelling changes
- Take X-rays to determine the position of the bones
- Decide on the time when it’s safe to remove the splint
- Discuss rehabilitation exercises
- Your doctor may also evaluate nerve and vascular function to ensure no post-splint complications.
Rehabilitation and Physical Therapy After Splinting
Whereas splinting achieves immobilization at the acute stage of healing, rehabilitation after splinting is critical for restoring normal joint and limb function. The clinicians should coordinate well the shift from immobilization to mobility to avoid stiffness, weakness, and re-injury.[15]
Advantages of Early Rehabilitation
The special benefits of custom splints in rehabilitation are that they can be taken off during exercise. The ability to remove the splint when exercising greatly limits stiffness and reduces the time to resume the former levels of functioning. Early rehabilitation is especially important for shin splints treatment, thumb spica splints, and finger splints, allowing controlled motion while preventing reinjury.
Rehab Exercises after Splinting
After the splinting is taken off, a program of rehabilitation must follow. Physical therapists prescribe exercises that proceed in a series of steps:[16]
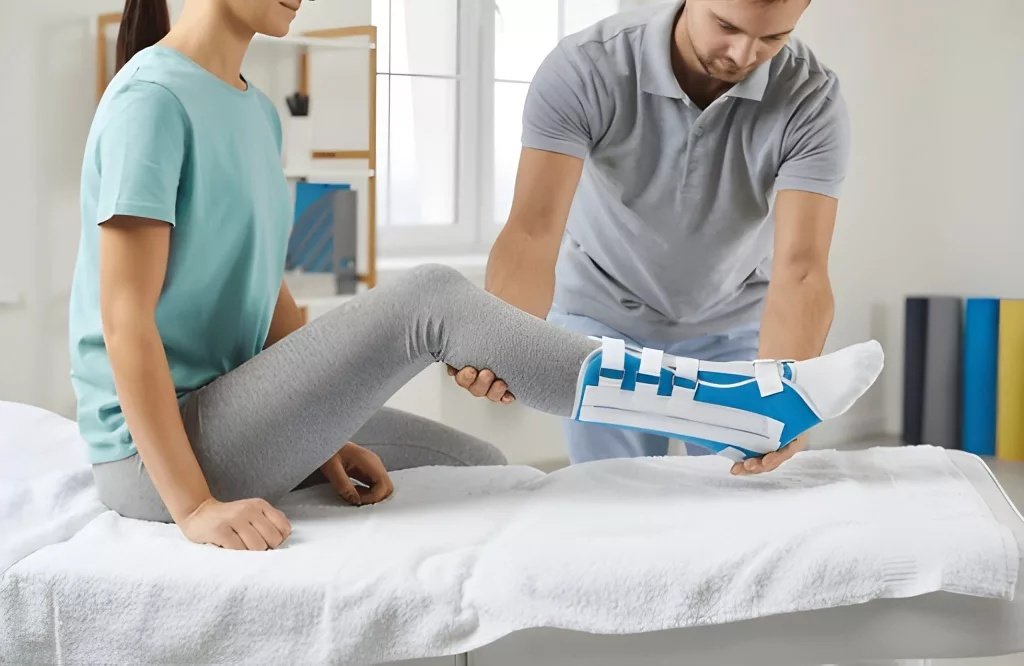
A woman with a splint on her shin lies on a couch in the physiotherapist’s office in the rehabilitation center.
First Phase: Gentle Range of Motion
- Start with passive exercises in which the therapist manipulates the joint.
- Move to active-assisted exercises
- Also, ensure that you work on the stiffness and not the pain
Second Phase: Strengthening
- Therapy band resistant exercises.
- Doing more exercises involving weight support.
- Increasing the strength of the muscles to support the recovery process.
Third Phase: Functional Training
- Sport or occupation-specific movements.
- Coordination exercises.
- Revive normal life under surveillance.
The rehabilitation program typically lasts between a few weeks and a few months. Regular follow-ups with the exercises prescribed are essential in recovery.
Special Considerations for Splinting
For Children
Splinting requires more attention in children since they are more active. They are not normally concerned with instructions. Removable splint devices are preferable for children who have a fracture of the wrist or ankle.[17]
For Athletes
In athletes, Dynamic splints are best to enable controlled movements during recovery. Thus, this splint serves to cushion them against injury.[18]
For Older Adults
The elderly patients require special attention as they most often have other diseases. They might experience numbness as a result of diabetes or peripheral vascular disease.[19]
Splinting for Teeth: Stabilizing Dental Injuries
While splinting is most commonly associated with fractures of the limbs, the same principles of stabilization and protection are also applied in dental care. Dental splints are used to stabilize loose, fractured, or traumatized teeth, allowing the surrounding tissues to heal properly. Unlike limb splints, dental splints typically use flexible wires or resin materials to secure the teeth in place without causing additional damage. This technique is essential in dental trauma management and helps prevent long-term complications such as tooth loss or misalignment.[20]
Conclusion
Splinting is an art to deal with injuries and fractures, and it contributes significantly to the healing process. As a patient or a health care provider, you need to know how to apply it appropriately.
The instability due to the injured area requires immobilization to reduce the chances of further injury, soft tissue protection, pain, and healing. Splints can be used to assist in recovery and enable patients to resume normal functions by adhering to splinting principles and by keeping an eye on complications.
It is important to remember to always consult expert healthcare providers in order to receive the best medical advice. All injuries require the assessment of a professional for the best treatment.
References
[1] Boyd, A. S., Benjamin, H. J., & Asplund, C. (2009). Splints and casts: indications and methods. American Family Physician, 80(5), 491-499.
[2] Eiff, M. P., & Hatch, R. L. (2018). Fracture Management for Primary Care and Emergency Medicine (3rd ed.). Elsevier.
[3] Flinkkilä, T. et al. (2009). Principles of Casting and Splinting.American Family Physician, 80(1), 16-22.
[4] Madsen, K.A. et al. (2008). Basic Splinting Techniques.The New England Journal of Medicine, 358(19), e19.
[5] Sabharwal, S., & Patel, N. K. (2020). Principles of fracture management. Surgery (Oxford), 38(10), 597-604.
[6] Öçal, S., & Duygu, D. (2023). A comparison of single sugar-tong splint vs long arm cast for pediatric distal forearm fractures.Joint Drs Journal.
[7] MPC Authors. (2023). Upper Extremity Splint Application.ScienceDirect.
[8] Boyd, A. S., Benjamin, H. J., & Asplund, C. (2009). Principles of casting and splinting. American Family Physician, 79(1), 16-22.
[9] Pizzutillo, P.D. (2009). Splints and Casts: Indications and Methods.American Family Physician, 80(5), 491-499.
[10] Derkash, R. S., Powley, S., Davignon, M., & Filbin, R. (1985). A comparative study of casts made from fiberglass versus plaster. Journal of Emergency Medicine, 3(1), 45-49.
[11] Stewart, D., & Kiebzak, G. M. (1998). Effects of casting materials on the heat of application. Orthopaedic Nursing, 17(5), 41-46.
[12] Ramos, M. B., De Carvalho, L. H. Jr., & Santos, M. A. (2007). Comparison of plaster and fiberglass casts regarding temperature during application. Revista Brasileira de Ortopedia, 42(7), 213-218.
[13] Lavalette, R., Pope, M. H., & Dickstein, H. (1982). Setting temperatures of plaster casts: The influence of technical variables. The Journal of Bone and Joint Surgery. American Volume, 64(6), 907-911.
[14] McQueen, M. M., & Court-Brown, C. M. (1996). Compartment monitoring in tibial fractures: the pressure threshold for decompression. The Journal of Bone and Joint Surgery. British volume, 78(1), 99-104.
[15] Garfin, S. R., Mubarak, S. J., Evans, K. L., Hargens, A. R., & Akeson, W. H. (1981). Quantification of intracompartmental pressure and volume under plaster casts. The Journal of Bone and Joint Surgery. American volume, 63(3), 449-453.
[16] Müller, M., Tsui, D., Schnurr, R., Biddulph-Deisroth, L., Hard, J., & MacDermid, J. C. (2004). Effectiveness of hand therapy interventions in primary management of carpal tunnel syndrome: a systematic review. Journal of Hand Therapy, 17(2), 210-228. https://doi.org/10.1197/j.jht.2004.02.009
[17] Handoll, H. H., & Elliott, J. (2015). Rehabilitation for distal radial fractures in adults. Cochrane Database of Systematic Reviews, 9, CD003324. https://doi.org/10.1002/14651858.CD003324.
[18] Cheng, J. C., & Shen, W. Y. (1993). Limb fracture pattern in different pediatric age groups: a study of 3,350 children. Journal of Orthopaedic Trauma, 7(1), 15-22. https://doi.org/10.1097/00005131-199302000-00004
[19] Wilcke, M. K., Hammarberg, H., & Adolphson, P. Y. (2013). Epidemiology and changed surgical treatment methods for fractures of the distal radius: a registry analysis of 42,583 patients in Stockholm County, Sweden, 2004–2010. Acta Orthopaedica, 84(3), 292-296.
[20] Court-Brown, C. M., & Caesar, B. (2006). Epidemiology of adult fractures: a review. Injury, 37(8), 691-697.
[21] Malhotra, N., Sharma, V., & Gupta, A. (2021).Dental splints: Types, indications, and clinical applications.Journal of Conservative Dentistry, 24(4), 345–352. https://doi.org/10.4103/JCD.JCD_123_21